Help · Guide 1 of 5
Prepare your PDF
Which print files work, and the three things to check before you upload.
-
Step 1
Start from the file you already print
Use the finished, approved PDF you would send to press: a business card, letterhead, badge, postcard or flyer. Two-sided pieces are fine as a two-page PDF (front and back). Files up to 50 MB.
You don't need to rebuild anything. StackFill keeps your layout, colors and artwork exactly as they are and only opens the parts you choose.
-
Step 2
Keep the text customers will change as live text
Anything a customer should type (name, title, phone, email, address) must be real text in the PDF, not converted to outlines. Outlined text is just shapes and can't become a field.
Put each piece of information on its own line where you can. If a name and title share one text box, you can still split them in the editor, but separate lines make marking fields faster.
Logos, color bands, photos and outlined artwork are fine: they stay locked.
-
Step 3
Include bleed and keep it CMYK
If color touches the edge, extend it past the trim (usually 3 mm or 0.125 in) just as you would for any press job. StackFill keeps your trim and bleed in the final file.
CMYK colors are kept exactly. RGB colors are converted on upload, so a file built in CMYK gives the most predictable result.
-
Step 4
Check it free before you upload
Not sure? Run the file through the free PDF check. It flags missing bleed, RGB color, fonts that aren't embedded and low-resolution images. No account needed and the file isn't stored.
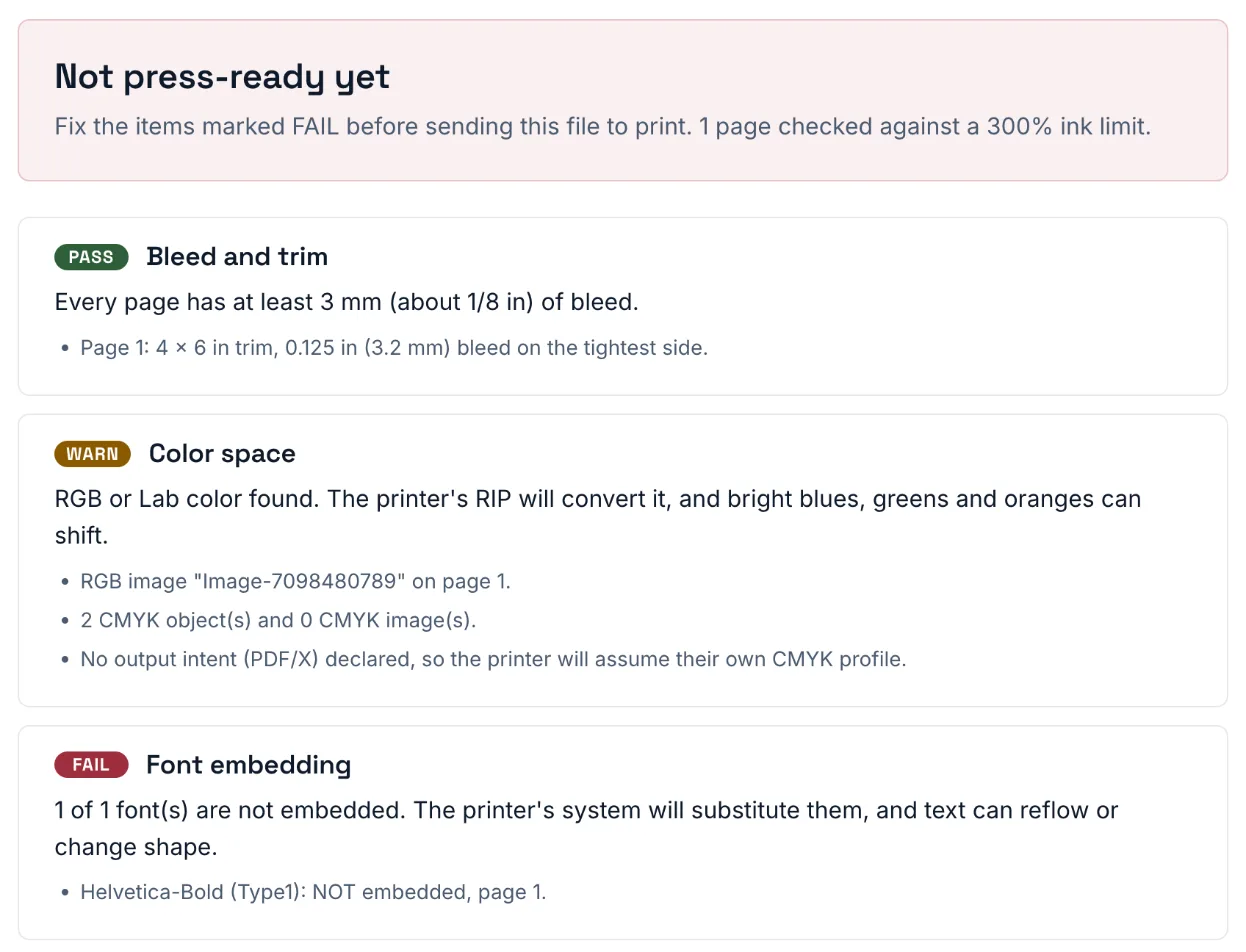
The free PDF check on our sample postcard: bleed passes, an RGB photo gets a warning, an unembedded font fails.